
Four wheel robot by Arduino(Uno)
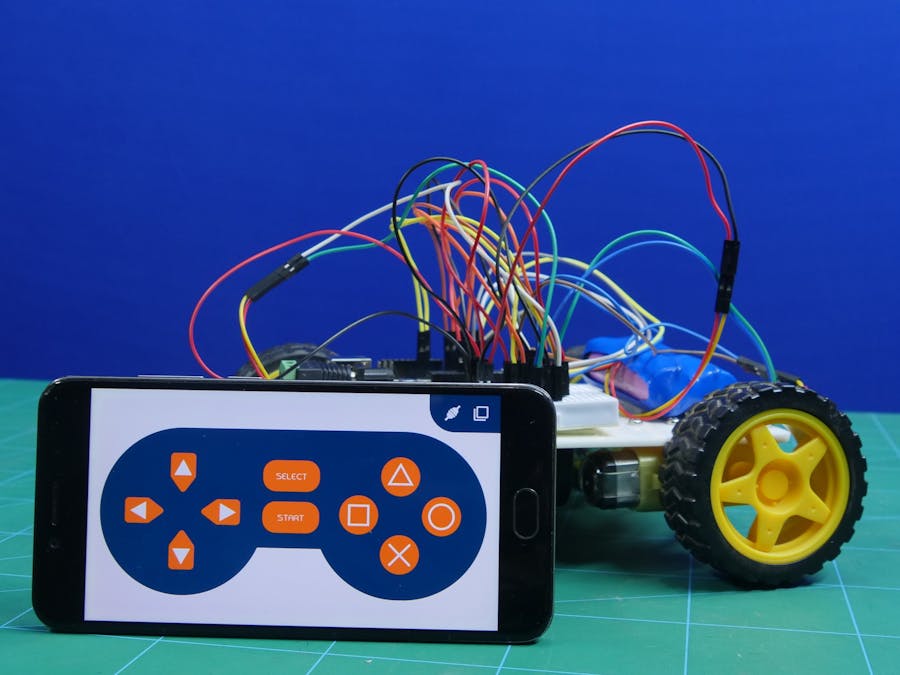
This project is gonna show you how you can make an awesome (DIY) 4-wheel robot which can be controlled by using your smartphone via mobile application.
SO…LETS GET STARTED !!! 👍👍👍
I will show you the exact road-map from which you can make an awesome DIY car and will be able to showcase your talent in front of professers & friends…
Components you needed to make your own (DIY) Arduino car
- An ardunio board
- bread-board
- jumper wire
- wheels
- motor driver
- bluetooth module
- two LEDs
- Glue gun
- Battery
The code you needed for Arduino
Copy and paste the code in your Arduino IDE
 /*
 *  in this project we will be using HC-05 bluetooth module
 *  for arduino "UNO" use bluetooth module buadrate below 38400
 *
 *  connection of bluetooth module with arduino
 *
 *  HC-05 bluetooth module ----> arduino "UNO"
 *
 *              Tx         ----> 2
 *              Rx         ----> 3
 *
 *  Written by by Punit chotaliya, STEMpedia
 *  on 16 jan 2019
 *
 */

//To include the GamePad module in the Arduino program, you have to
//include the following header:
#define CUSTOM_SETTINGS
#define INCLUDE_GAMEPAD_MODULE

//include Dabble app library
#include <Dabble.h>

#define motor1_en 10      // motor 1 enable pin
#define motor2_en 11      // motor 2 enable pin
#define motor1_dir1 4     // motor 1 input1 (InputA)
#define motor1_dir2 5     // motor 1 input2 (InputA)
#define motor2_dir1 6     // motor 2 input1 (InputB)
#define motor2_dir2 7    // motor 2 input2  (InputB)

void setup()
   {
      // put your setup code here, to run once:

      Serial.begin(9600);   //  start serial communication using 9600 baudrate
      Dabble.begin(38400); // Enter your bluetooth module baudrate
                            // NOTE : for arduino "UNO" use bluetooth module buadrate below 38400
      for(unsigned int i=4;i<8;i++)
         {
             pinMode(i,OUTPUT); // declaring input pins of motor1 and motor2 as a output pin
         }
      pinMode(motor1_en,OUTPUT);  // declaring enable pins of motor as a output
      pinMode(motor2_en,OUTPUT);


    }

void loop()
     {
        // put your main code here, to run repeatedly:

         Dabble.processInput(); //To refresh the data that the arduino UNO got from the mobile app, you have to use the following line of code


        if (GamePad.isUpPressed()) // if UP is pressed in the gamepad then move robot forward
          {
             Serial.print("UP");
             forward();
          }

        else if (GamePad.isDownPressed()) // if DOWN is pressed in the gamepad then move robot backward
          {
             Serial.print("DOWN");
             backward();
          }

        else  if (GamePad.isLeftPressed()) // if LEFT is pressed in the gamepad then move robot LEFT
           {
              Serial.print("Left");
              left();
           }

        else  if (GamePad.isRightPressed()) // if RIGHT is pressed in the gamepad then move robot RIGHT
           {
               Serial.print("Right");
               right();
           }

        else // stop the robot
           {
            Serial.println("strop");
            Stop();
           }


     }

     void forward()  // function for robot forward movement
     {
        analogWrite(motor1_en,255);
        analogWrite(motor2_en,255);
        digitalWrite(motor1_dir1,HIGH);
        digitalWrite(motor1_dir2,LOW);
        digitalWrite(motor2_dir1,HIGH);
        digitalWrite(motor2_dir2,LOW);

     }
     void backward() // function for robot backward movement
     {
        analogWrite(motor1_en,255);
        analogWrite(motor2_en,255);
        digitalWrite(motor1_dir1,LOW);
        digitalWrite(motor1_dir2,HIGH);
        digitalWrite(motor2_dir1,LOW);
        digitalWrite(motor2_dir2,HIGH);

     }
     void left() // function for robot left movement
     {
        analogWrite(motor1_en,255);
        analogWrite(motor2_en,255);
        digitalWrite(motor1_dir1,LOW);
        digitalWrite(motor1_dir2,HIGH);
        digitalWrite(motor2_dir1,HIGH);
        digitalWrite(motor2_dir2,LOW);

     }
     void right() // function for robot right movement
     {
        analogWrite(motor1_en,255);
        analogWrite(motor2_en,255);
        digitalWrite(motor1_dir1,HIGH);
        digitalWrite(motor1_dir2,LOW);
        digitalWrite(motor2_dir1,LOW);
        digitalWrite(motor2_dir2,HIGH);

     }
     void Stop() // // function for no movement
     {
        analogWrite(motor1_en,0);
        analogWrite(motor2_en,0);
        digitalWrite(motor1_dir1,LOW);
        digitalWrite(motor1_dir2,LOW);
        digitalWrite(motor2_dir1,LOW);
        digitalWrite(motor2_dir2,LOW);

     }
